Collaborate in Chart Studio
How to collaborate on plots and grids in Chart Studio
Introduction
Whether you're using Chart Studio to create graphs for school, business, or for fun, you can share and export these graphs so your colleagues and friends can see your work. Additionally, you can add collaborators to your charts.
What's the difference between sharing and collaborating?
Sharing is a way for people to view your plot, and you can do so publicly or with a secret link. For more information about sharing, click here. Collaborating is not only sharing your plot, you're giving your fellow collaborator the permission to edit it as well. It's a way for more than one user to work on the same plot.
Please note that the collaborators also need to sign up to Chart Studio if they don't already have an account.
Add Collaborators to a Plot
After you've plotted, styled and saved your graph, you can start adding collaborators.
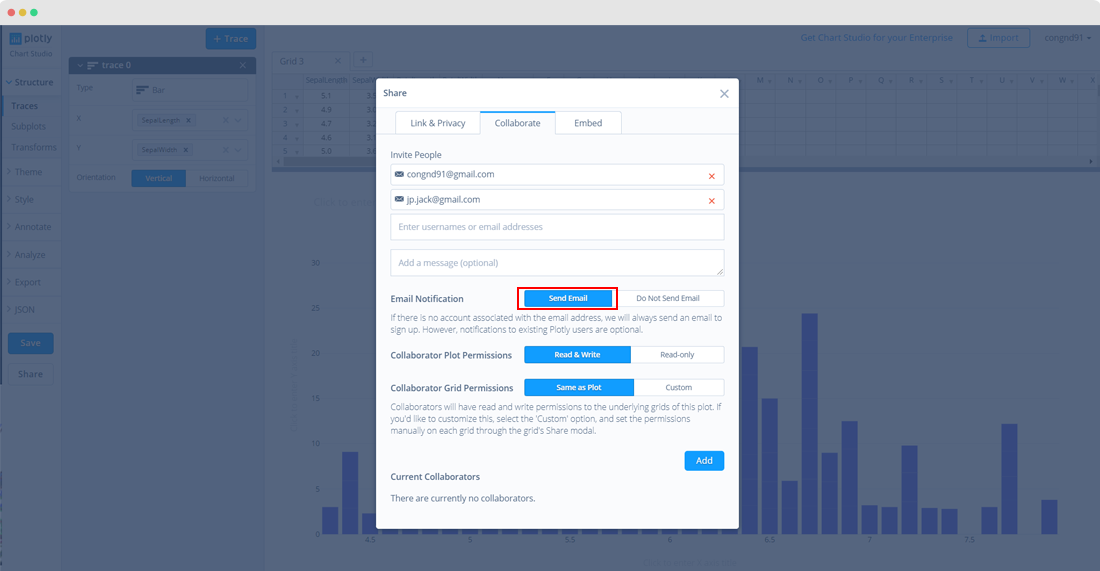
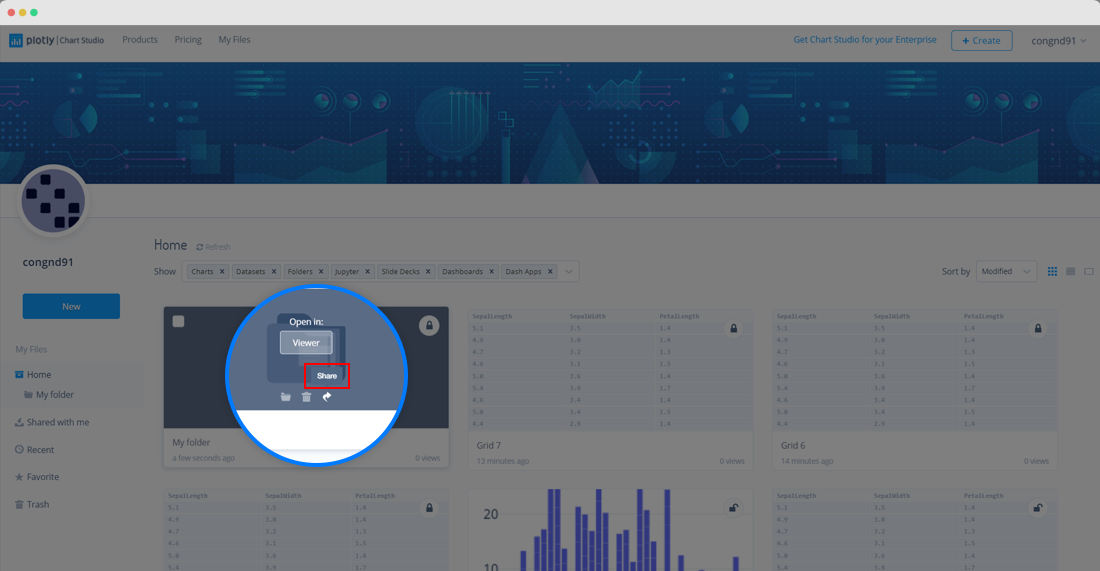
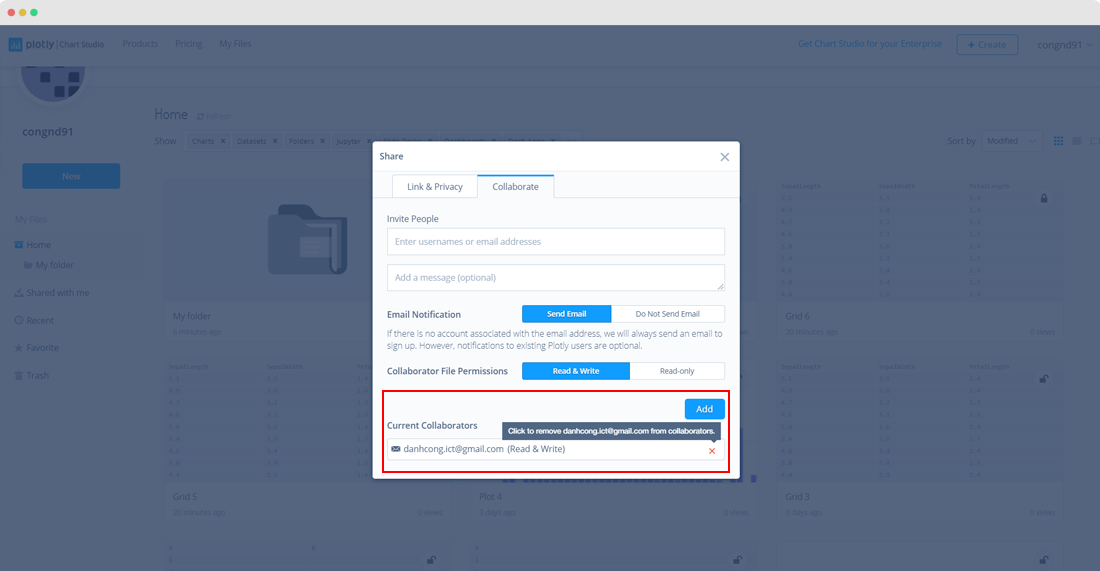
Click on the 'Share' button on the left-hand side of the Chart Studio. When the 'Share' modal appears, click on the 'Collaborate' tab at the top. Enter the Chart Studio username or email address of the collaborators, and you can add a message if you wish. You can also add more than one collaborator, as seen below.

In addition to collaborating on the plot, collaborators can also edit the grid (data) associated with the plot. By default, the option 'Add Collaborators to Grids' is checked in. You can uncheck this option while adding collaborators, to restrict them from editing the grid. Please note that when the 'Add Collaborators to Grids' option is off, the collaborators can still edit the [style] (http://help.plot.ly/style-your-plots/) of your chart.
Also, if the 'Send Notification Email' option is checked, an email will be sent to the collaborator's email address (associated with their plotly account). Please note that if the collaborator is added by email but does not have a Chart Studio account, a sign-up link will be sent in the email. After signing up, they will be able to view and edit the plot.
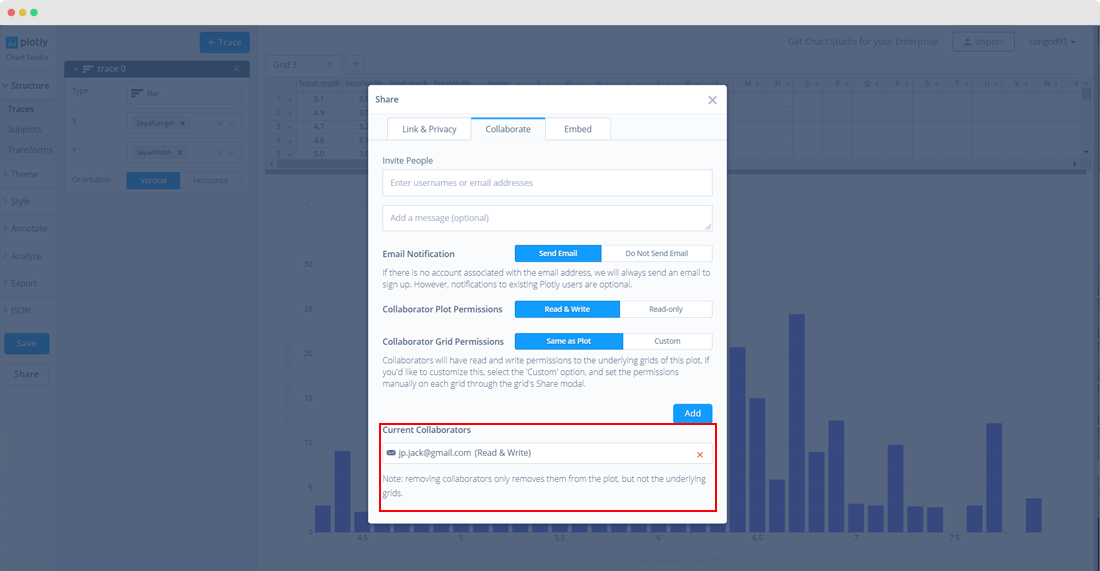
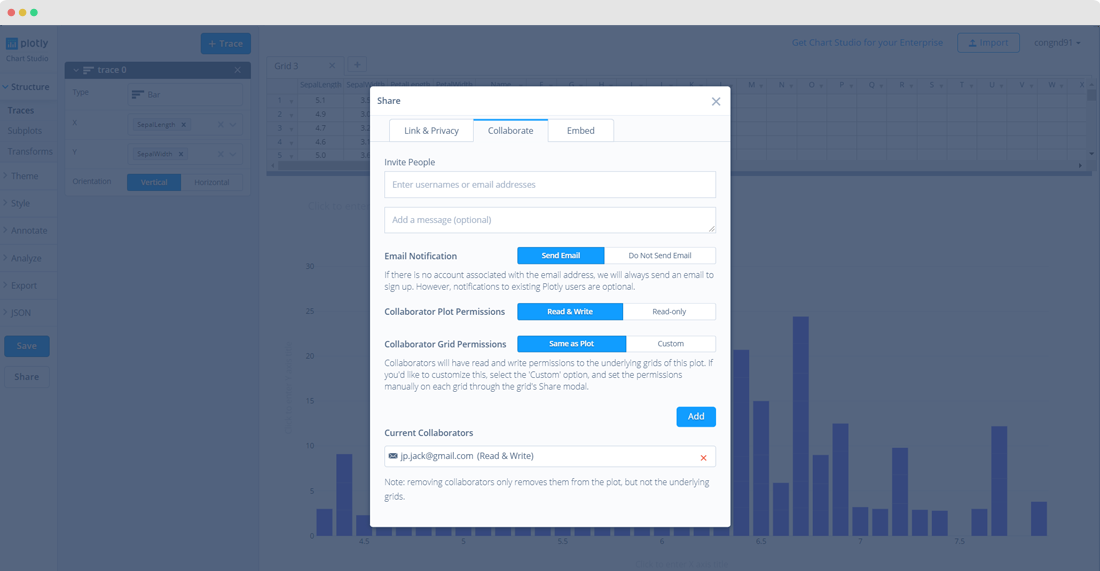
Once you've clicked 'Add', the collaborator's username or email address will appear under the 'Current Collaborators' field.
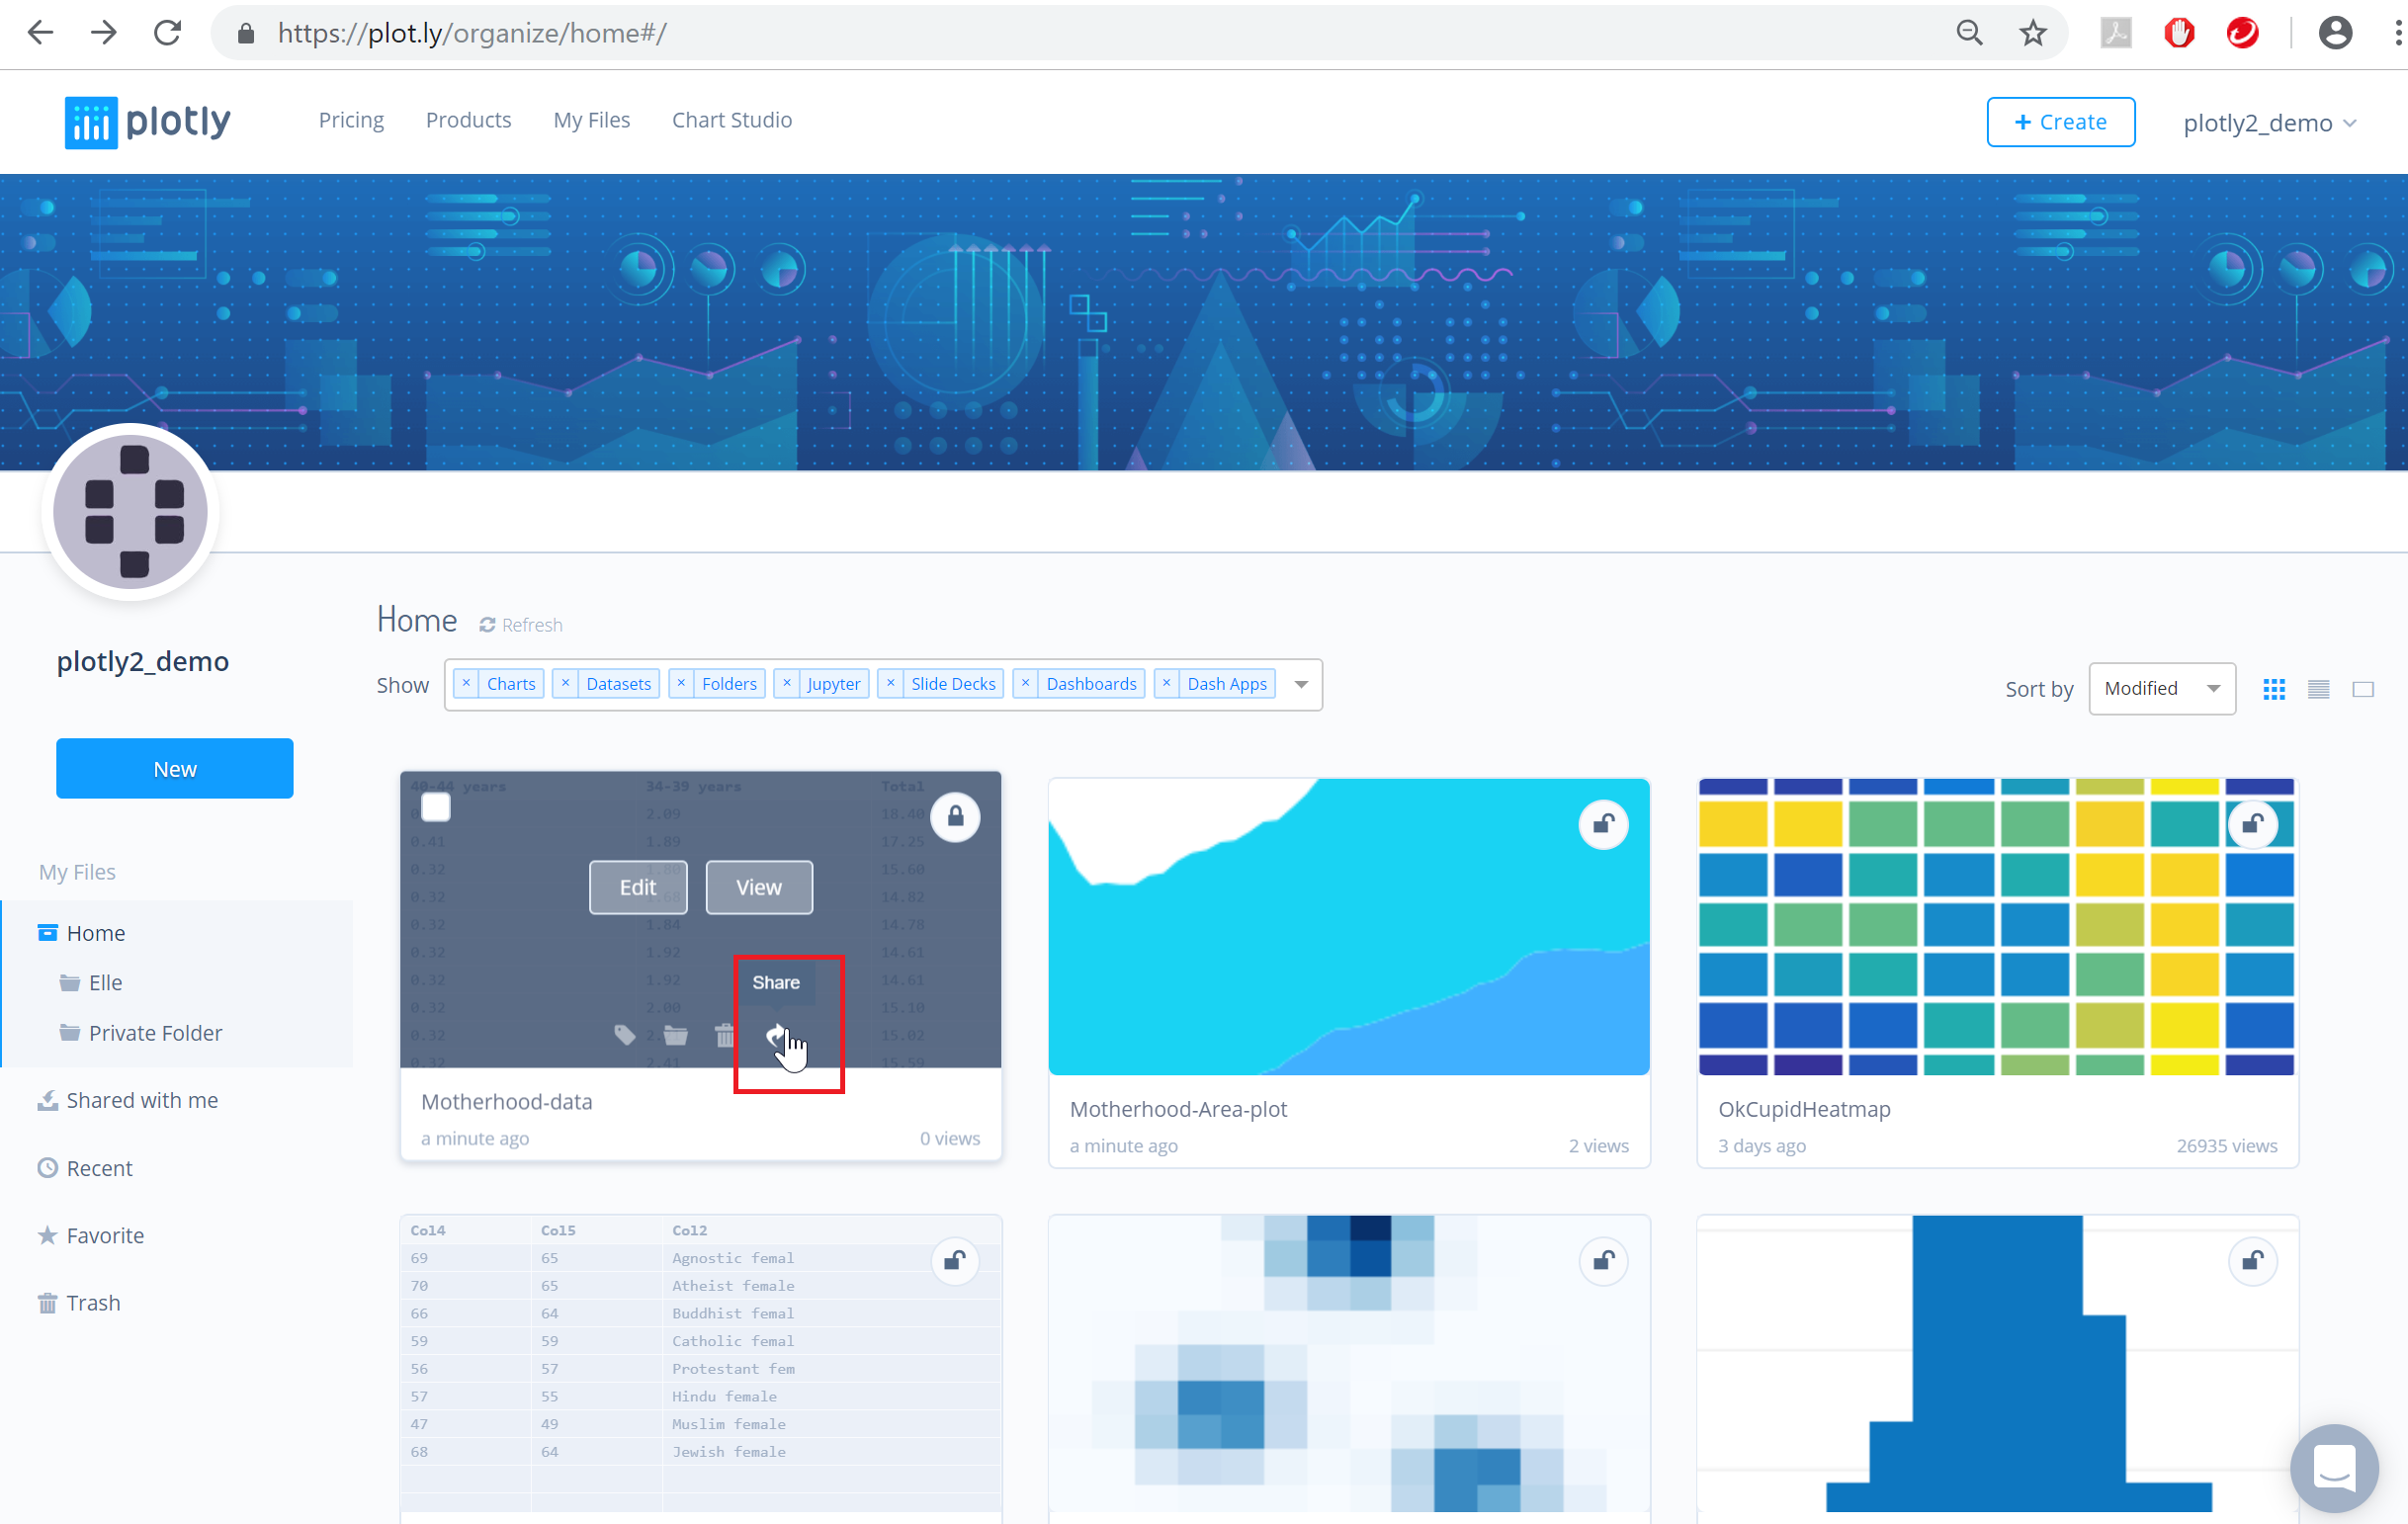
Another approach to add collaborators is by navigating to your 'Organize' page where the plots and data are stored. You can hover over the plot or grid thumbnails and then click the 'Share' icon.
Add Collaborators to a Grid
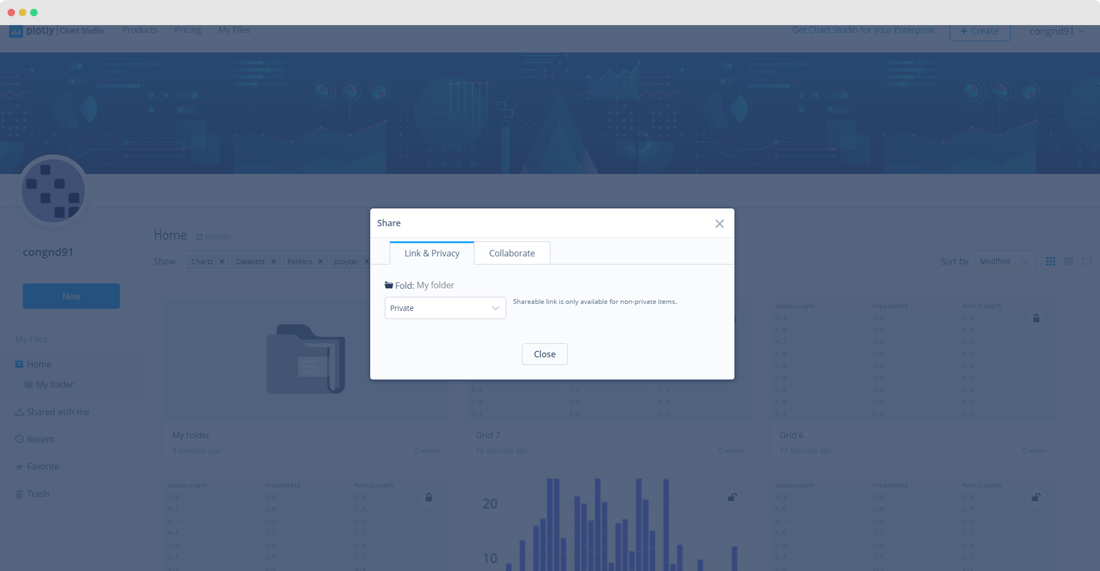
To add collaborators only to the grid (data) associated to a plot but not the plot itself, go to the 'Organize' page, then click on the 'Share' icon after hovering over the grid's thumbnail. The 'Share' modal will then look like as seen below. Choose the desired privacy options for the folder and then proceed with adding the collaborators in the 'Collaborate' tab.
Add Collaborators to a Folder
In addition to adding collaborators to individual plots or grids, the owner can also add collaborators to folders containing various files. To do that, go to the 'Organize' page, then click on the 'Share' icon after hovering over the folder's thumbnail.
The 'Share' modal will then look like as seen below. Choose the desired privacy options for the folder and then proceed with adding the collaborators in the 'Collaborate' tab.
Please note that all files within that folder will be shared with the collaborators and also removing collaborators can then only be done at the folder level. So a shared folder cannot have files that are not shared.
Remove Collaborators
If you want to remove your collaborators, click on the 'x' next to their name. When you hover over the 'x', you'll see a little pop-up telling you to click to remove that user from being a collaborator.
As a Collaborator
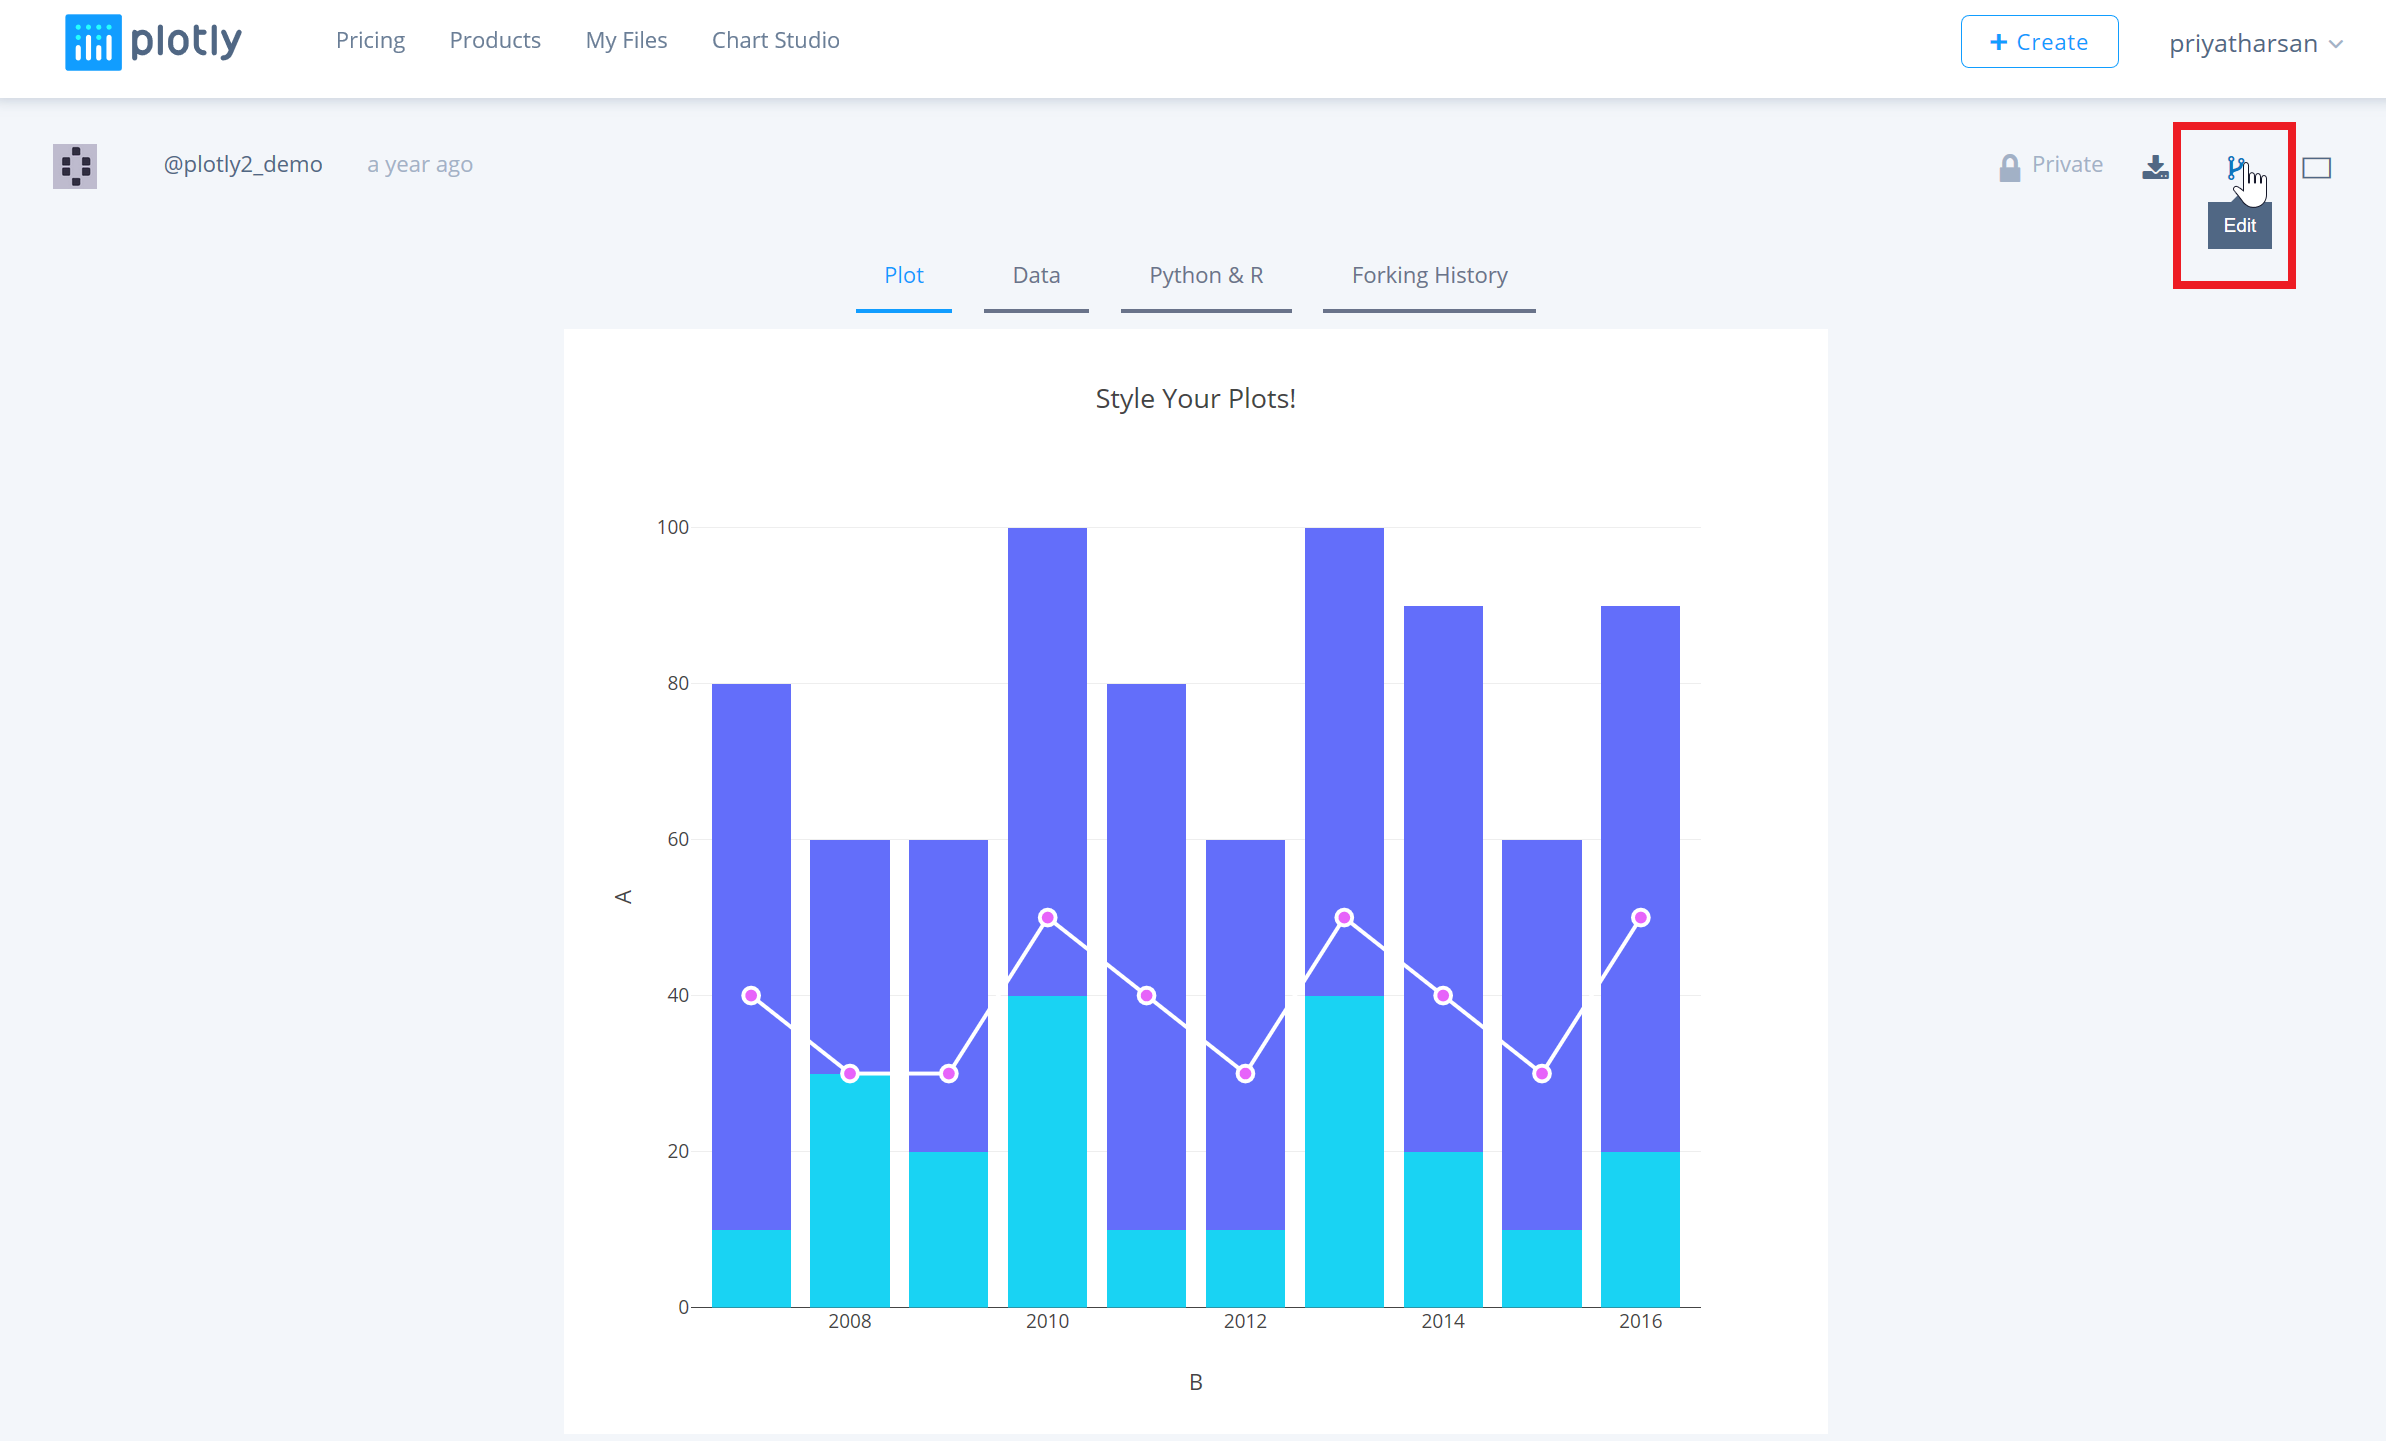
If the owner of the plot has opted to notify you by via email, you'll receive one, stating that they want to share a plot with you and wish to collaborate. You'll be given a link of where you can view the plot. You can then click on the 'Edit' icon on the top right corner to edit the plot.
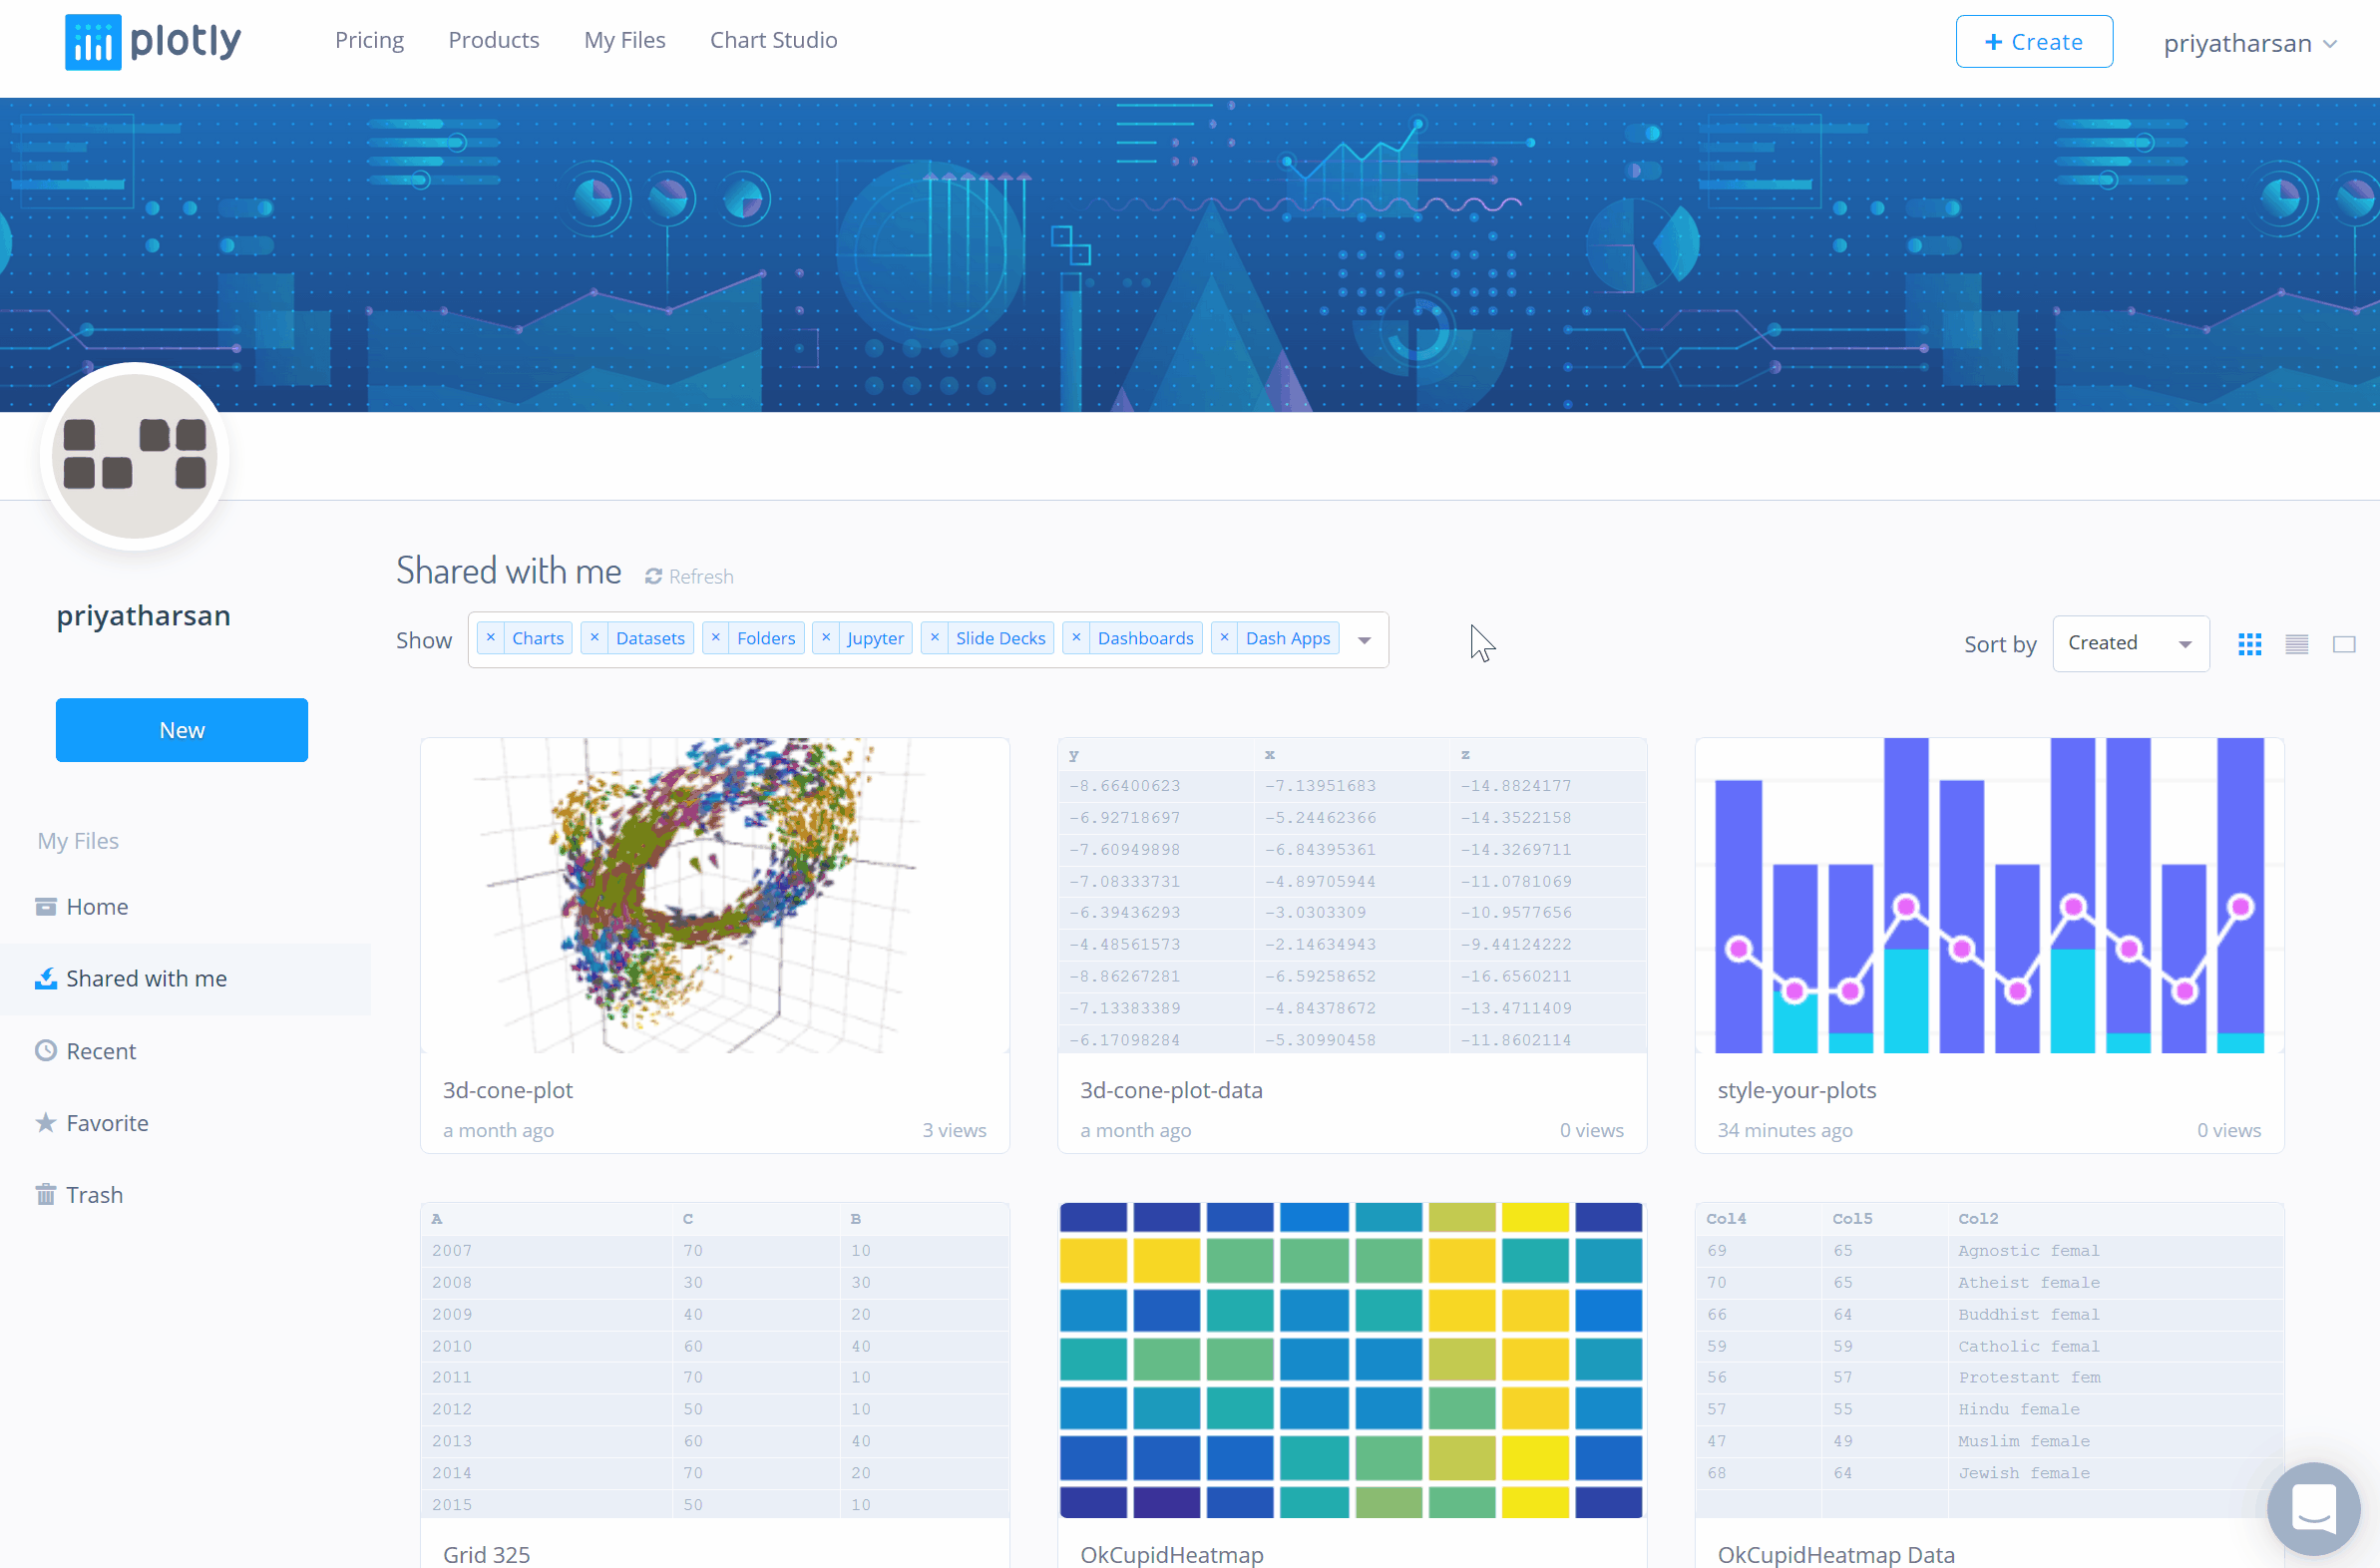
Additionally, all shared plots and grids can be viewed on the 'Organize' page, by clicking on the 'Shared with me' tab on the left-hand side, as seen below.
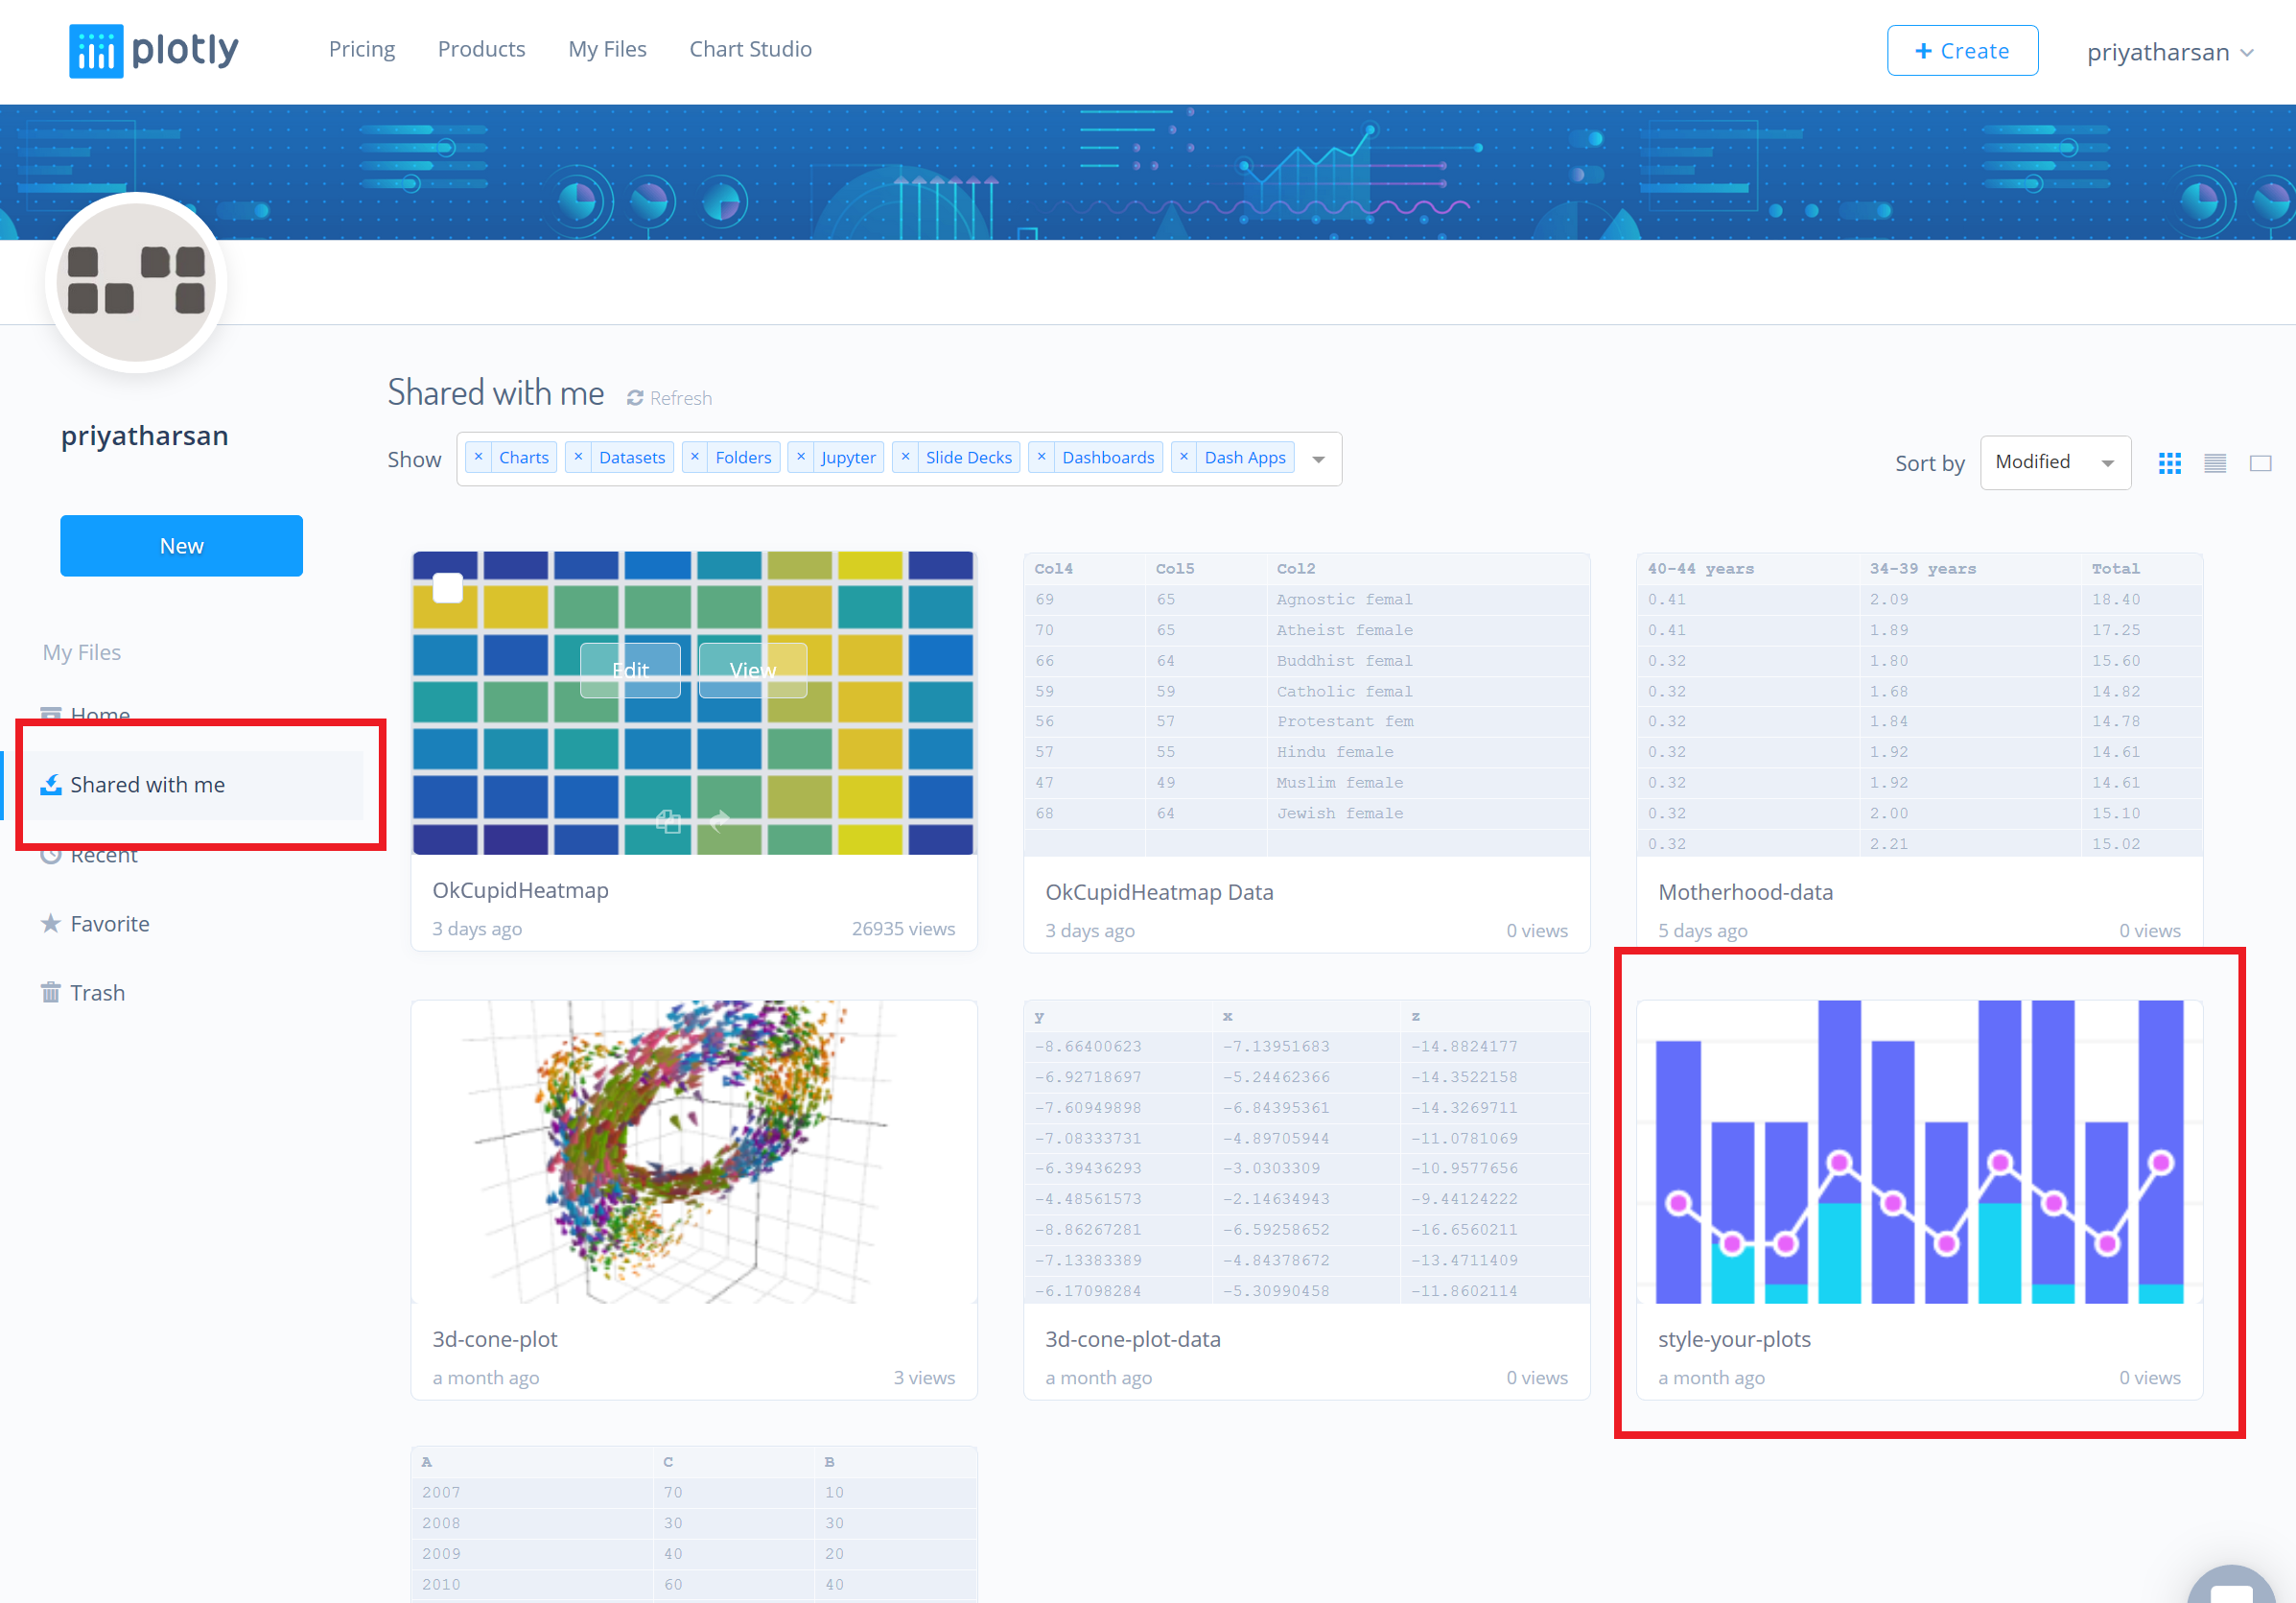
The plot or grid can be viewed or edited by clicking on the 'View' or 'Edit' buttons that appear when hovering over file thumbnails.
If you click on the 'Edit' button, you'll be taken to the Chart Studio, and you'll be able to edit the file that was shared with you.
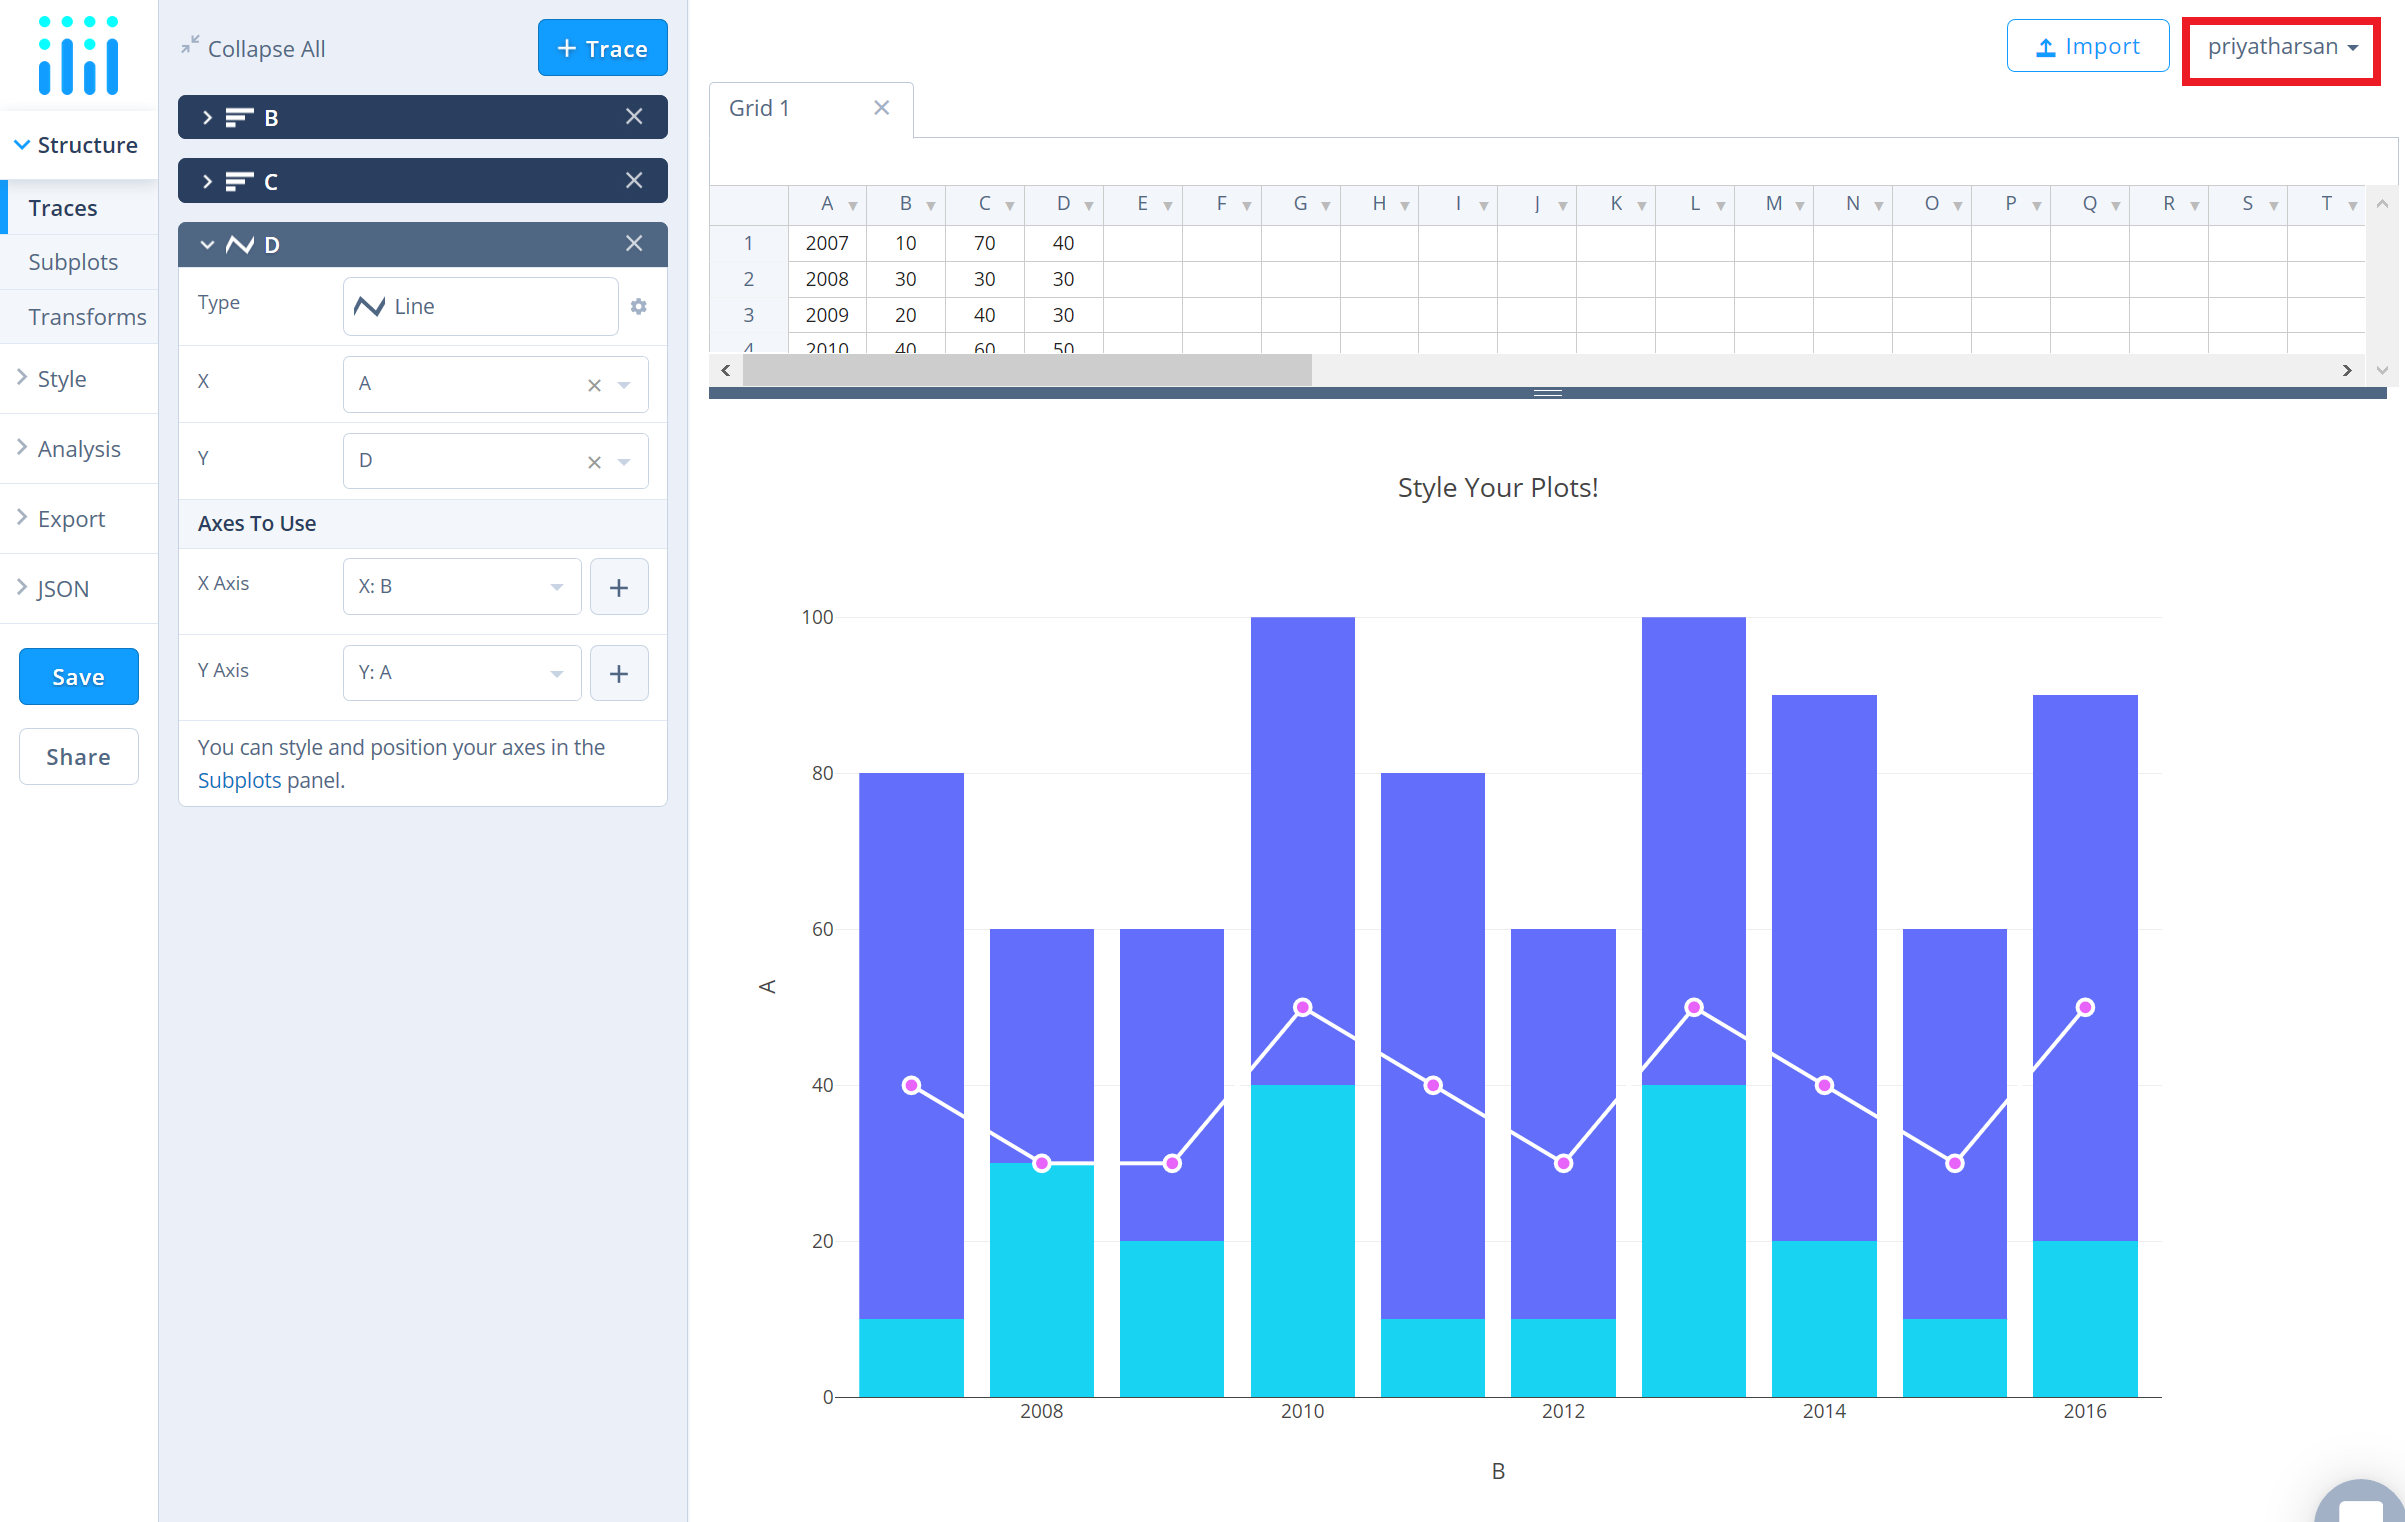
After making the necessary changes, save the plot and data by clicking on the 'Save' button on the left-hand side. Once your plot is saved, the owner of the files that were shared with you will be able to see your updates.
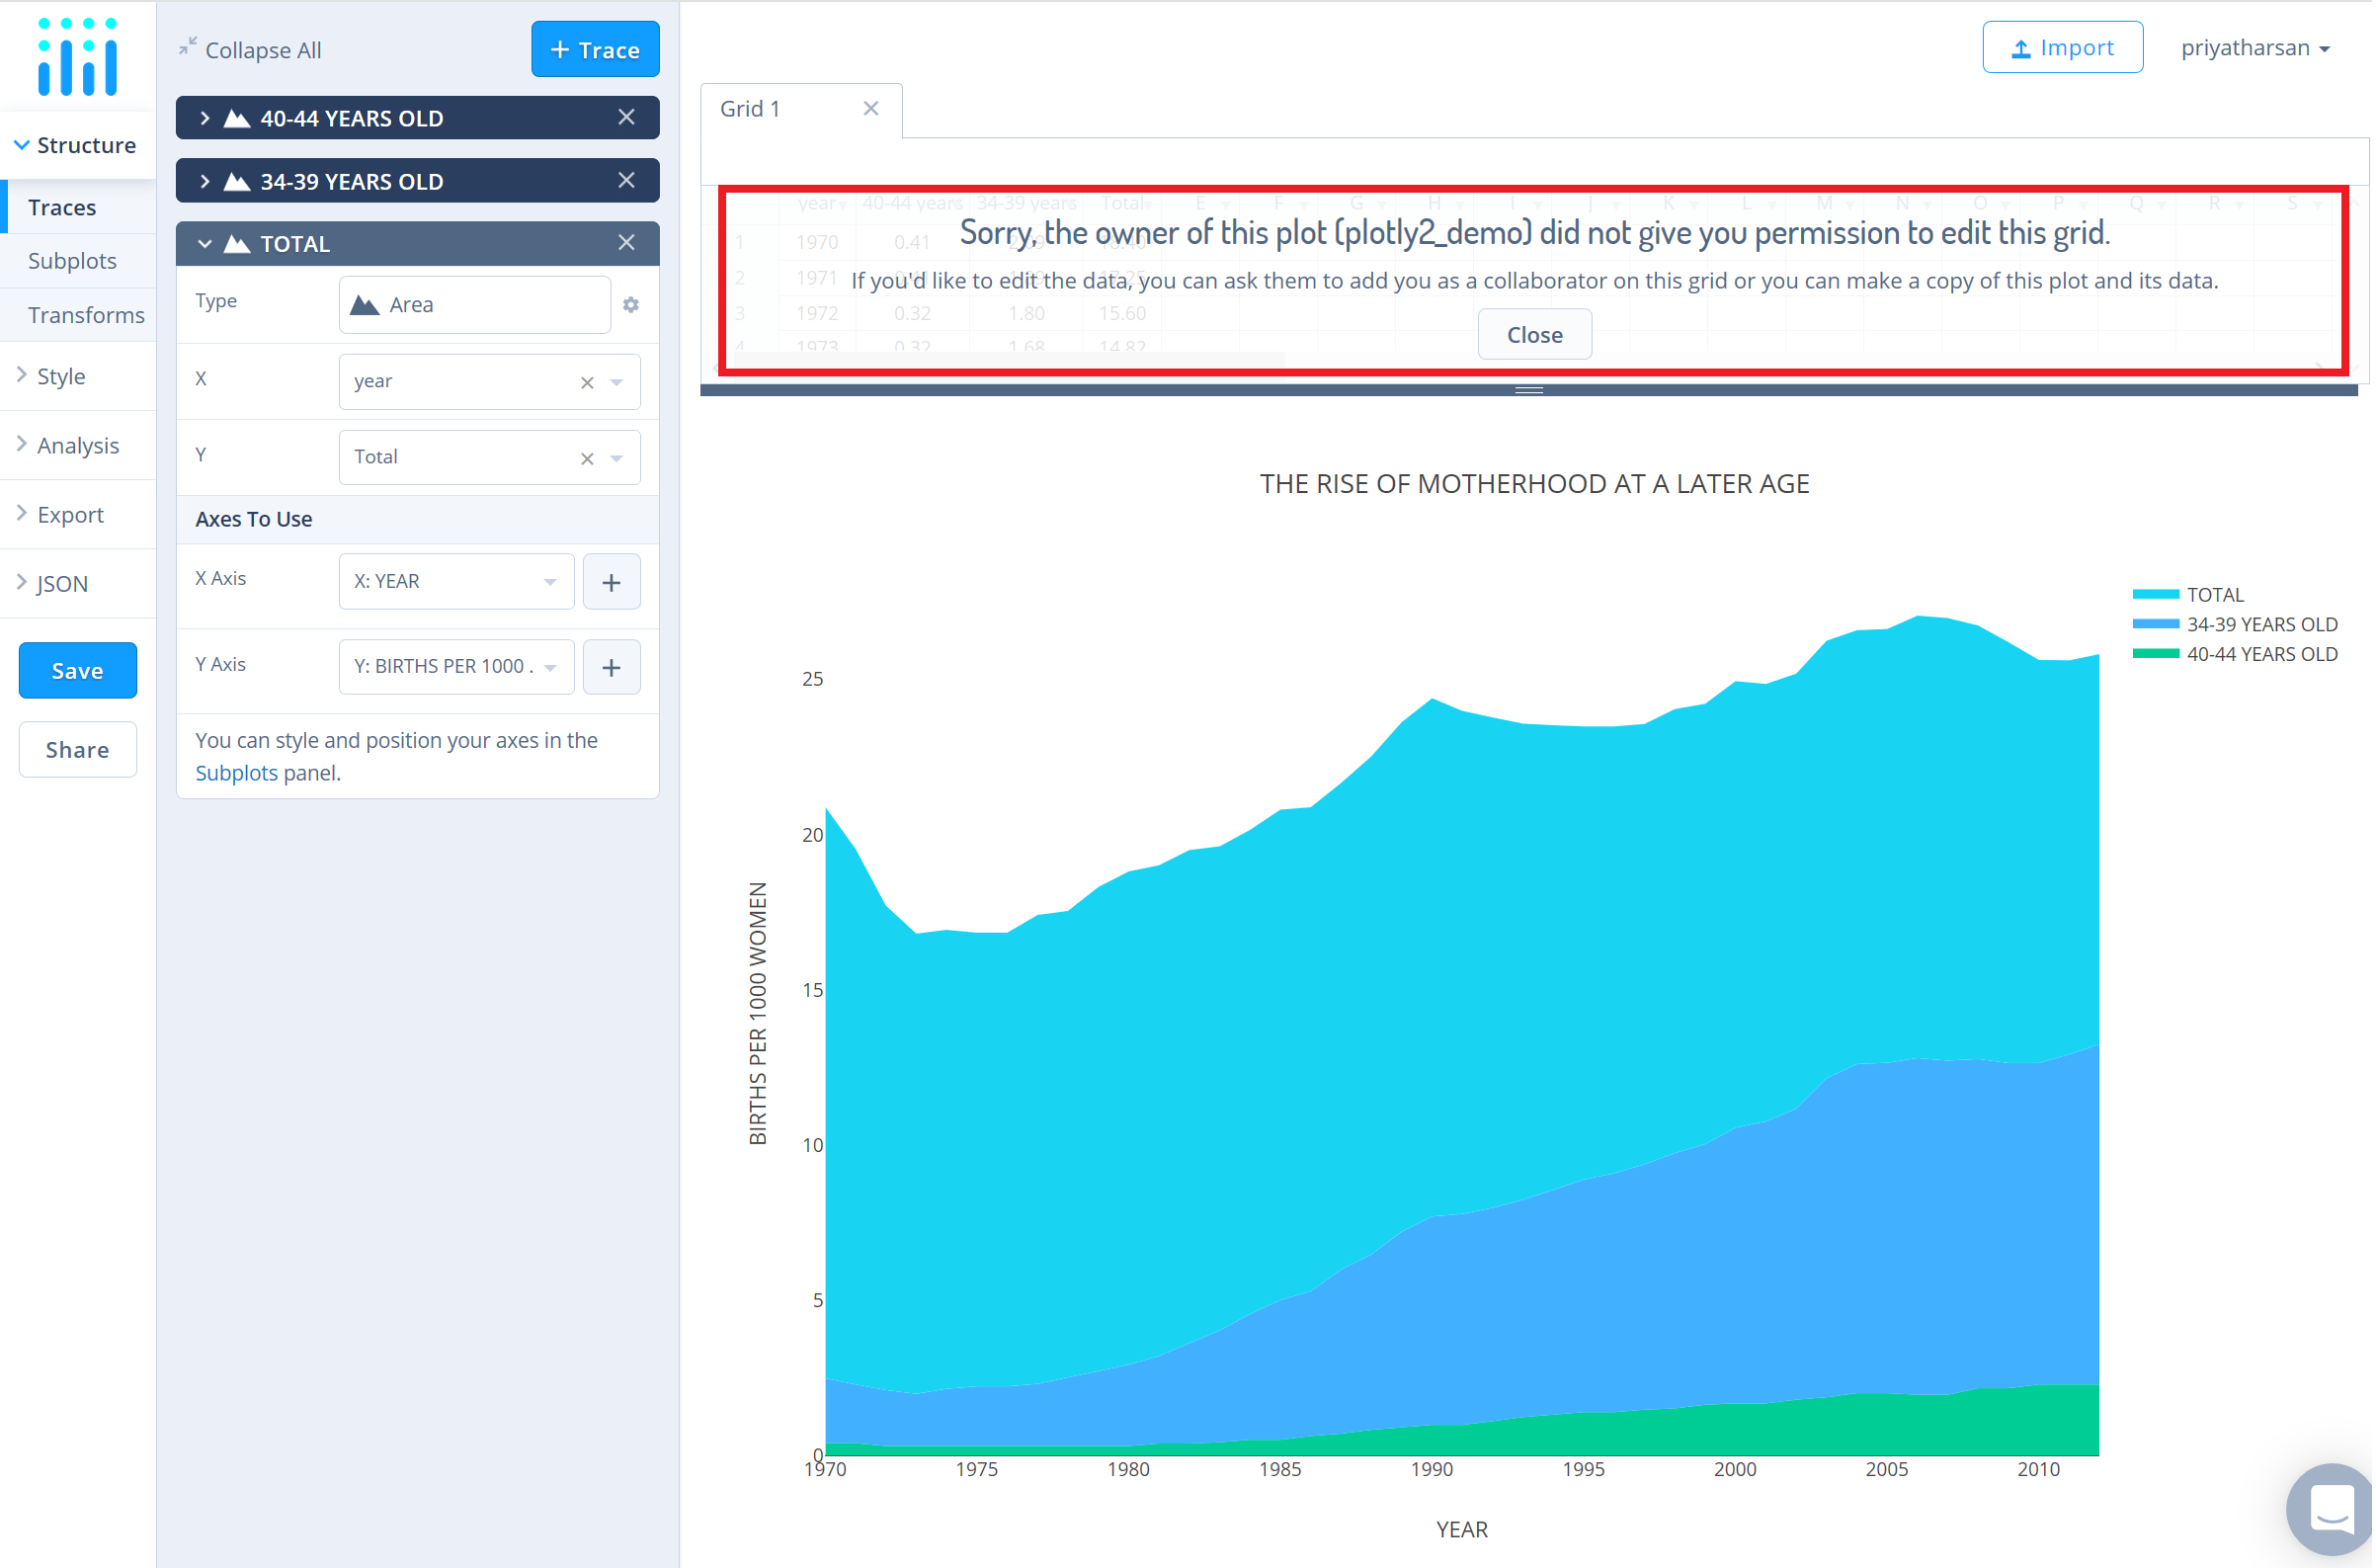
If the owner of the plot added you as a collaborator only for the plot but not the grid, you cannot edit the grid, however, you can make copies of the plot and the grid in order to play around with the data of the plot.
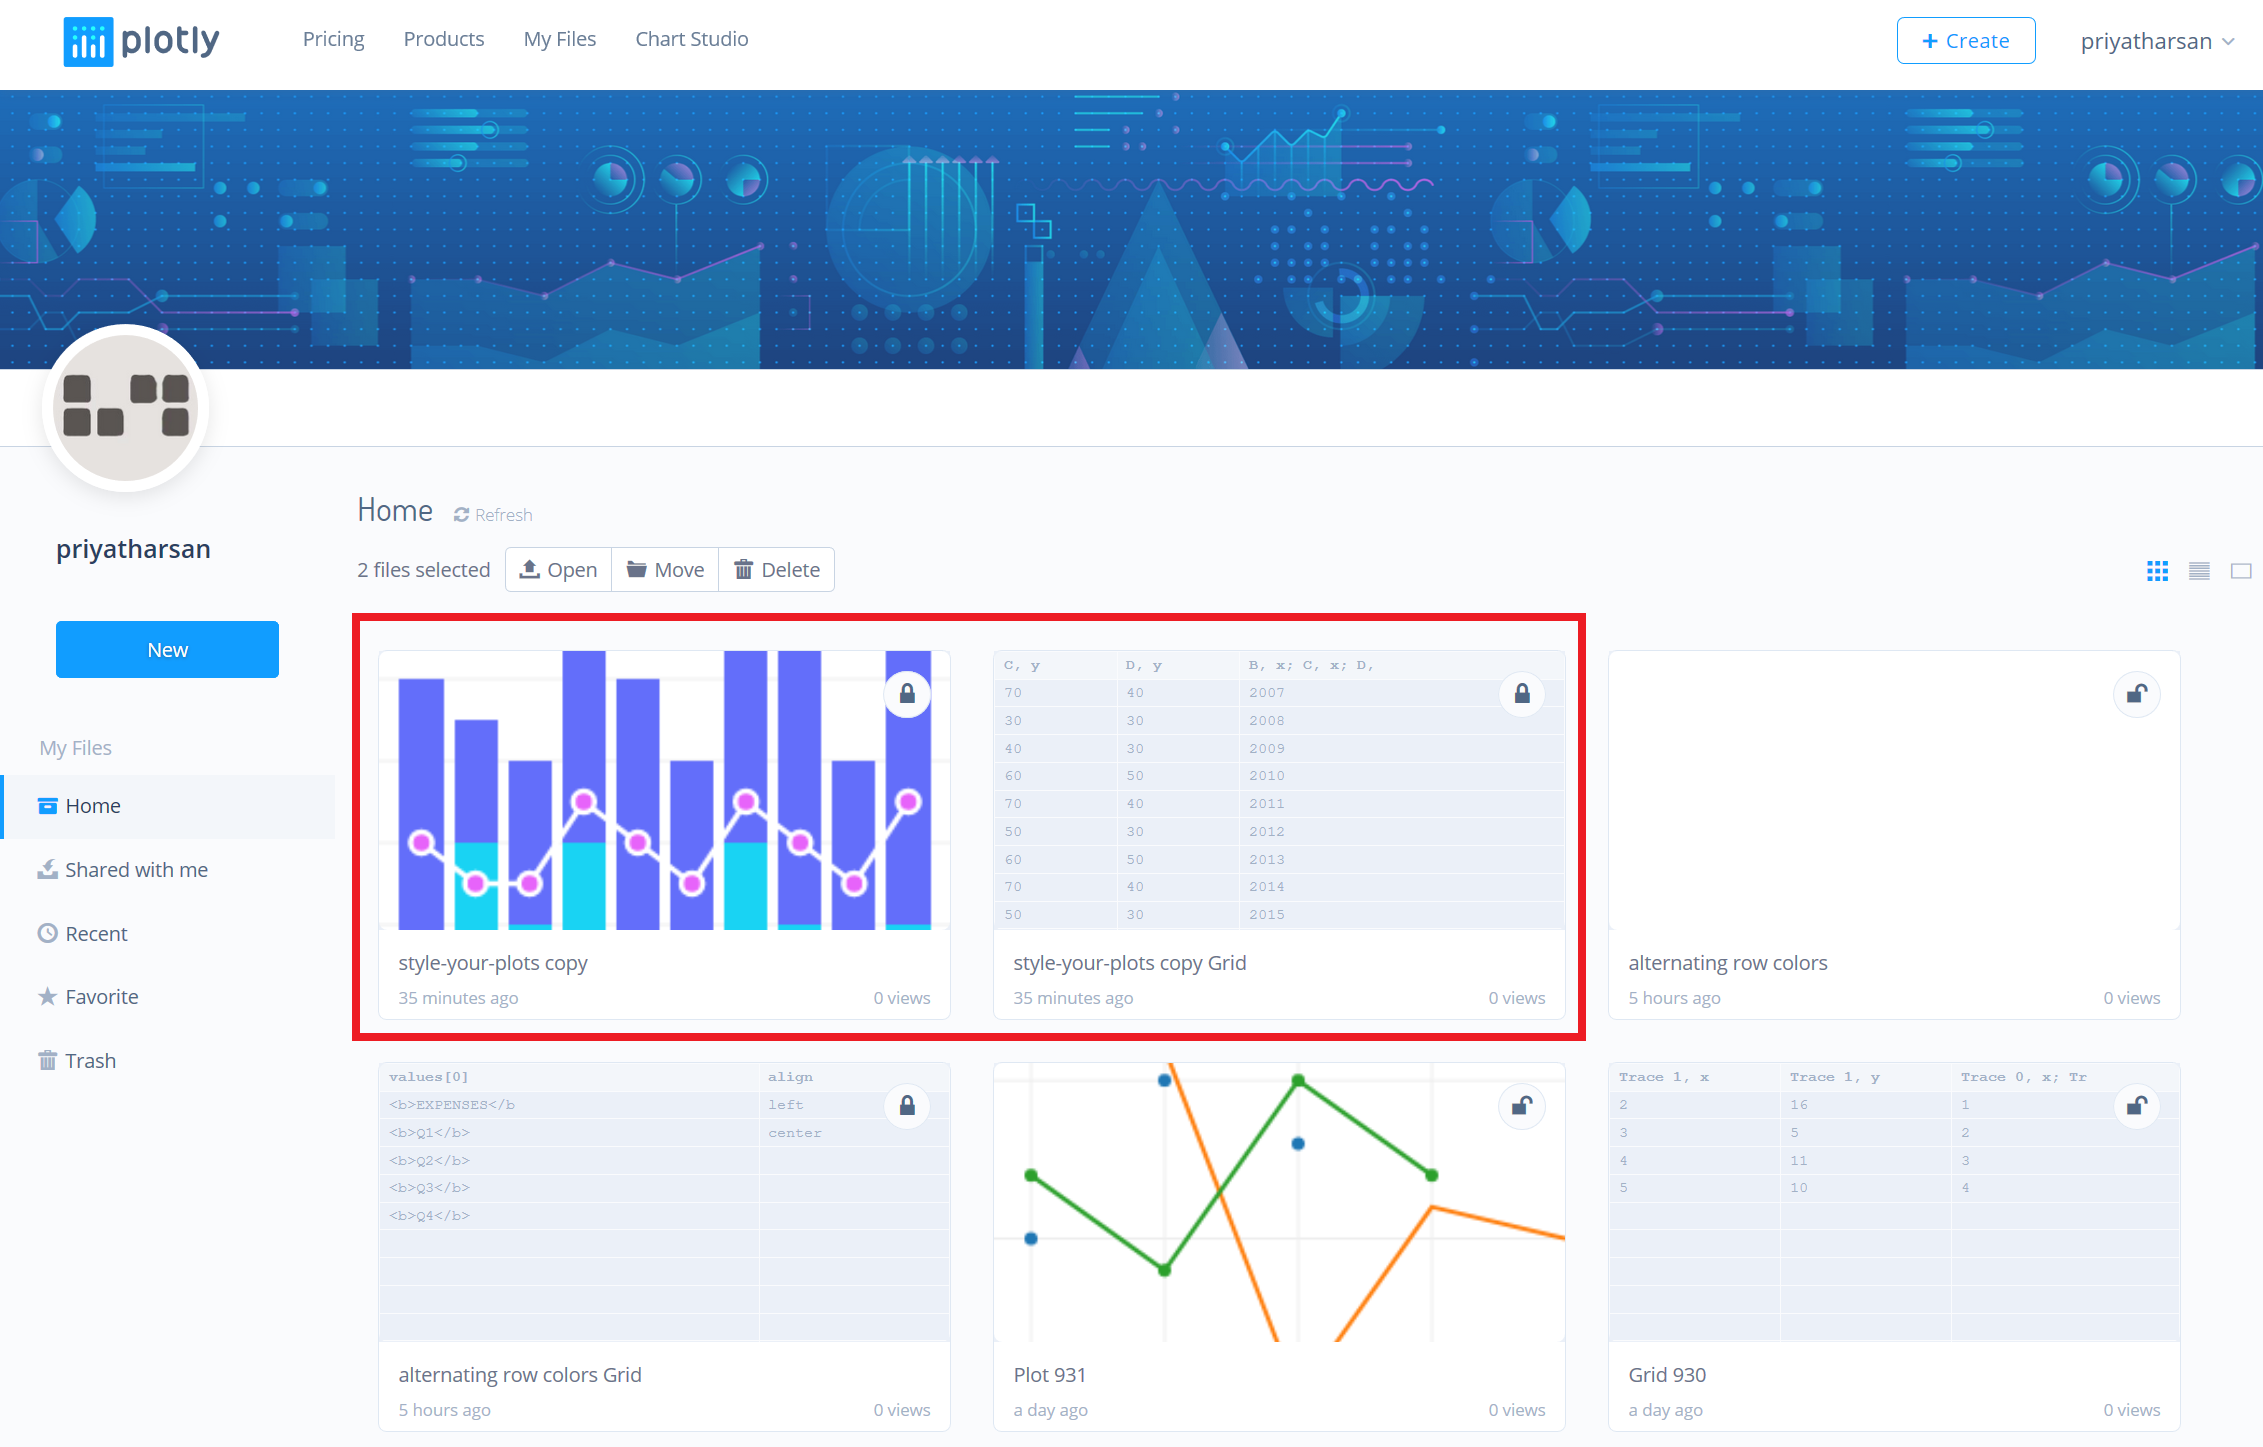
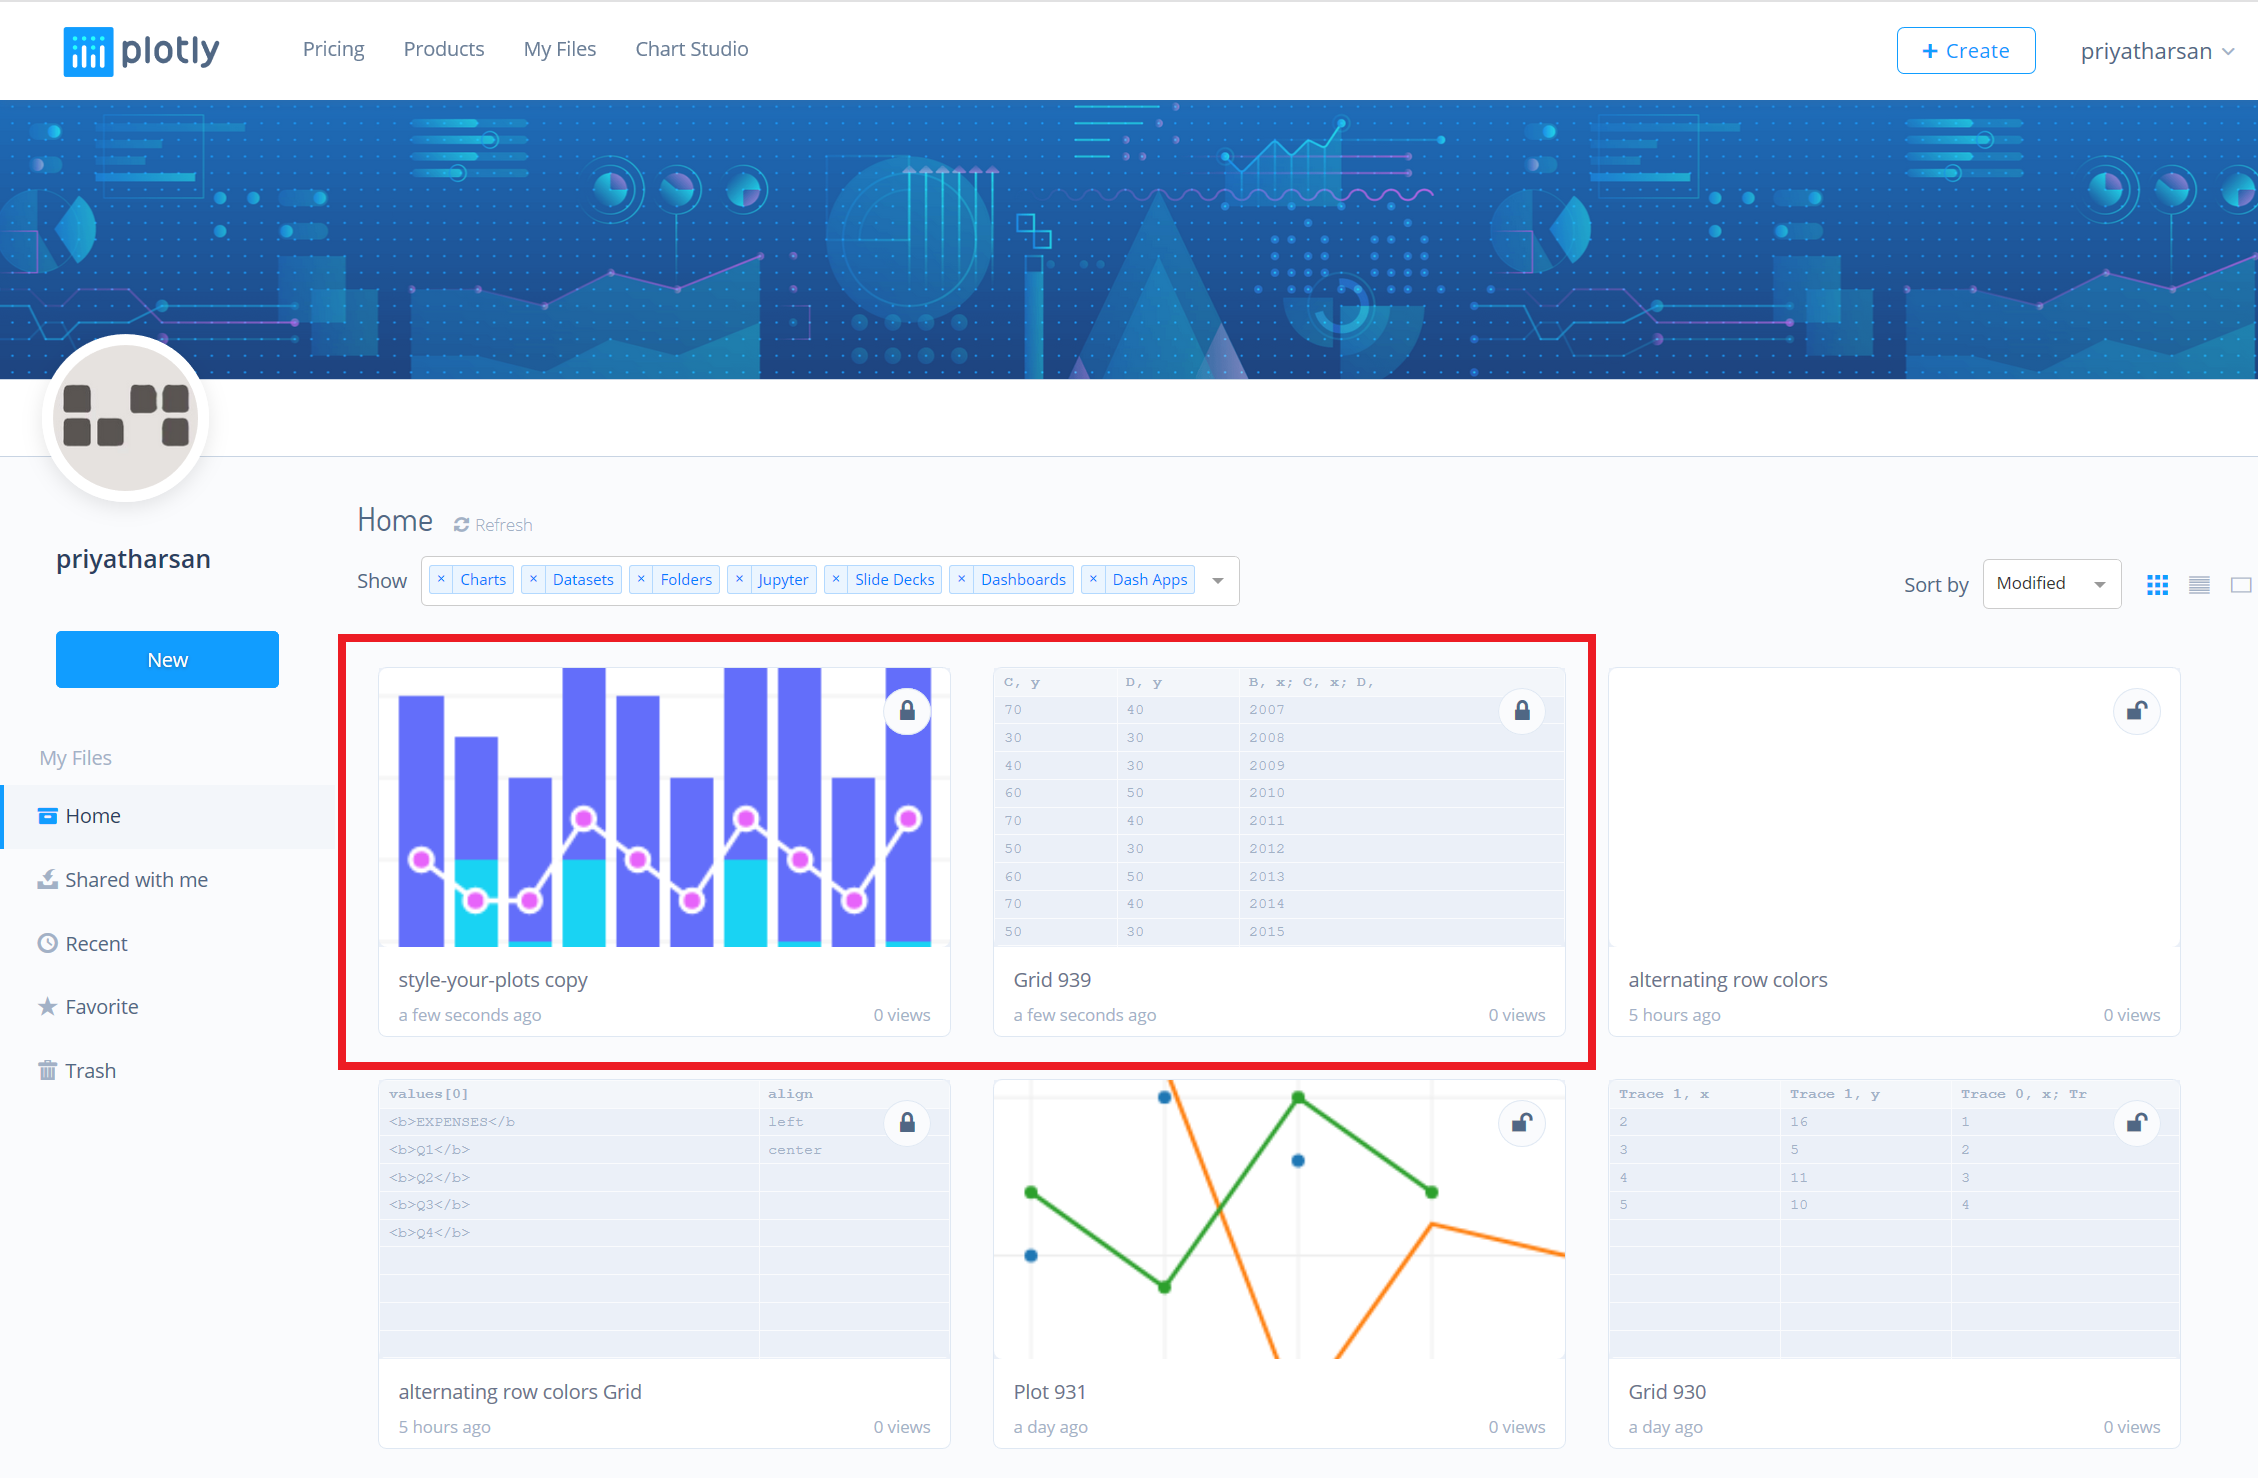
To make copies of the plot and the grid, go to the 'Shared with me' page, hover over the plot thumbnail and click the 'Copy'icon.
![]()
A 'Copy file' modal will then appear. There are two ways of copying as seen below.
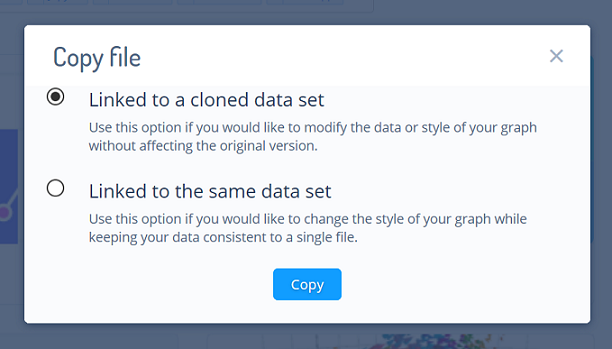
The option 'Linked to a cloned data set' creates your own copies of the plot and grid. Any changes made to the copied plot or grid, will not affect the original files shared with you.
The copied plot and grid can be found in the 'Organize' page.
The option 'Linked to the same data set' creates your own copy of the plot and links the grid of the plot to the original grid shared by the owner. Any changes made to the copied plot's grid will get reflected on the reference grid, and thus, the owner will be able to see those changes on the grid. But since you've loaded your own plot with a reference grid, you can add more grids to that plot. Please note that when saving the plot after making changes, the save modal will not allow you to change the name of the reference grid.
The copied plot and the reference grid can be found in the 'Organize' page.
Helpful Reminders
Collaborating on files with others, will allow them to change the original files.
When a plot, but not its grids is shared with a collaborator, a modal will notify the collaborator that their status is 'read only' on the grid if they try to edit it.
Collaborators don't have access to adding more grids (data) to plots, change file names, file privacy options or add more collaborators. Only the owner can perform such actions.
If the owner of the plot has opted to save the plot or grid as private, no one will be able to view them, only the collaborators will be able to view or edit them.
For an easier way to keep your files organized, and to keep track of the plots and their associated grids, we highly recommend to save them with proper filenames.